The importance of maintaining the integrity of your home’s roof cannot be overstated. Shingles are a vital component of this structure, offering a critical defense against weather elements. When shingles become damaged, they can lead to leaks and further deterioration of your roof. Understanding how to repair shingles yourself can save you both time and considerable money on hiring professionals. This comprehensive guide will walk you through the process of identifying damaged shingles, the materials and tools required, the step-by-step repair process, and tips to prolong the life of your shingles.
How to Identify Damaged Shingles?
Identifying damaged shingles is an essential first step in maintaining your roof’s health. Visible signs of damage often include curling at the edges, cracks on the shingle surface, or shingles that are completely broken. Sometimes, granules from shingles may accumulate in your gutters, indicating erosion of the protective surface. Pay close attention to any dark patches on your roof, as these are commonly indicative of missing shingles. Regularly inspecting your roof, especially after severe weather, can help in early detection of shingle damage.
Other signs include water stains on ceilings and walls indoors, which can suggest there’s a leak due to shingle damage. During a roof inspection, check for moss or algae growth, which can lift shingles and allow moisture in. Thunderstorms and wind are common culprits for loosening shingles, so extra vigilance following such events is vital. Besides a visual inspection, you can also look for other signs of wear such as soft spots when walking on the roof surface. Physical indentation might indicate that the shingle substrate has weakened.
For a more thorough inspection, it might be beneficial to use binoculars to survey the roof from the ground. This method enhances safety while allowing you to look for lifted or misaligned shingles. A ladder can provide a closer inspection if safe ground-based observation proves inadequate. It’s key to note that while small problems can be addressed quickly, larger sections of damage may require a partial or full re-roofing, which could be a significant undertaking. Consistent observation enables you to address potential issues before they escalate into costly repairs.
What Materials and Tools are Needed for Shingle Repair?
To perform shingle repair, homeowners will need a variety of materials that can be easily sourced from a local hardware store. Essential materials include roofing shingles to match your current roof material. A match helps maintain aesthetic continuity and ensures the repair blends seamlessly. You will also need roofing nails, which will secure the shingles in place, and roofing cement, a critical adhesive component for sealing. Additionally, don’t overlook having replacement underlayment on hand in case the damage extends beyond the shingles.
The tools required for shingle repair are just as crucial. A ladder is indispensable for accessing the roof safely, while a hammer is necessary for nailing down shingles. A pry bar will be useful for removing damaged shingles, and a utility knife will help in cutting shingles to fit the necessary dimensions. Additionally, caulk or a sealant gun will be needed for applying roofing cement effectively. It’s wise to wear appropriate safety gear, including a sturdy pair of gloves and shoes with excellent grip to prevent any accidents during the repair process.
It’s essential to highlight the importance of quality over budget when choosing materials and tools for repair. Investing in higher-grade materials ensures durability and a longer lifespan for your repair work. Regular maintenance checks thereafter will guarantee that all repairs remain intact over time. Remember to store surplus materials for future repairs as shingle types and colors can be discontinued over time. By being thoroughly prepared with the right materials and tools, homeowners can tackle shingle repairs confidently and effectively from the onset.
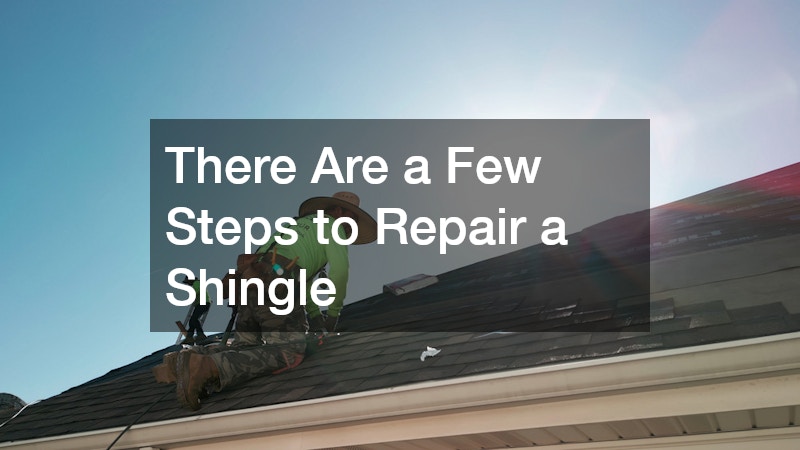
What are the Steps to Repair a Shingle?
Begin the repair process by assessing the extent of the damage on the affected shingles. Use a pry bar to gently lift the damaged shingle, ensuring not to harm adjacent shingles. Remove any nails that are holding the damaged shingle in place and carefully slide out the compromised piece. Once removal is complete, slide the new shingle into place, aligning it perfectly with nearby shingles. Fasten the new shingle with roofing nails, ensuring they are flush with the surface yet secure enough to withstand the elements.
After the new shingle is secured, apply roofing cement under each tab of the shingle to prevent it from lifting during inclement weather. Use the caulk gun for this purpose, applying an even amount to the undersides of the surrounding shingles as well. This serves to bond the shingles together, offering an extra layer of protection against wind. Remember that temperature changes can affect the flexibility of shingles; therefore, working on a mild day can make handling materials easier. After the shingles are secured, inspect the repair area to ensure there are no gaps or lifts.
If damage extends to the underlayment, cut a new piece to fit the area precisely before applying a new shingle. This replacement guards against moisture infiltration and adds another barrier for protection. Tests for leaks post-repair might include fully saturating the roof with water to guarantee the effectiveness of your repair work. With careful attention to detail at each stage, these steps can help maintain the structural integrity of your roofing, preventing further damage in the future. Diligence in these steps ensures that your roof remains a stalwart defender of your home.
How to Maintain Shingle Longevity?
The long-term health of shingles can be vastly improved through consistent maintenance practices. Start with regular cleaning, focused on removing debris that can trap moisture and hinder drainage systems. Utilize a leaf blower or a soft broom to clear out leaves and other materials that collect on your roof. Additionally, ensure that gutters and downspouts are clear, as backed-up water can wash over shingles leading to erosion and eventual leaks. Checking for plant growth and promptly removing moss and algae is another critical aspect of maintenance.
Periodically inspect for signs of wear and tear on your roofing. Even burdens caused by weight, such as snow accumulation in winter, should be addressed promptly to prevent cracks and breaks. If you live in an area prone to extreme weather, install roof enhancements like straps or additional nails to curb wind damage risks. Ventilation plays a crucial role in ensuring roofs don’t succumb to temperature-induced stress. Proper ventilation systems help control heat and humidity levels, preserving the shingles’ integrity year after year.
Lastly, conduct seasonal inspections to catch any potential issues before they grow into serious concerns. Engage professional services annually if self-inspections appear insufficient or to serve as a confidence check on your maintenance routine. Despite the durability of shingles, they are not immune to wear, and maintaining a schedule of oversight extends their functionality. Proactive shingle care results in fewer unexpected repairs and increases the time between necessary full roof replacements. An attitude of prevention, combined with the proper care tools, can secure your roofing’s utility for decades.
What are the Common Mistakes in Shingle Repairs?
One common error made during shingle repairs is neglecting to check for additional damage beyond the visible surface issues. It’s vital to inspect the surrounding area thoroughly, as unseen damage can lead to escalated problems. Improper installation techniques, such as failing to align new shingles correctly, can compromise roof integrity. Adjusting the position of shingles to fit may seem harmless but could result in leaving gaps or improperly sealing edges against water entry. Additionally, applying too much roofing cement can inadvertently trap moisture, leading to decay of the roofing materials underneath.
Skipping underlayment inspection during shingle repairs is another frequent misstep. While homeowners focus on the visible wear, the underlying structures may silently deteriorate. This neglect could cause small imperfections to develop into significant structural faults over time. Using incompatible roofing materials is another area where mistakes are often made. It is crucial to match new shingle materials with existing ones to ensure uniformity across the roof’s surface. Not doing so may weaken the roof’s structural cohesion due to differing expansion and contraction rates during temperature changes.
Finally, failing to undertake safety precautions during roof work can lead to preventable accidents. Ensure all safety gear is worn, ladders are secure, and never work during rainy or windy conditions to minimize hazards. Another oversight is underestimating the weather’s effect on repair materials; tar and cement applied under extreme temperatures may not bond effectively. Each roof has unique challenges tied to its environment and design that need to be appreciated before beginning repair work. Understanding these common mistakes smartly guides homeowners to perform repairs correctly and confidently.
By following this step-by-step guide, homeowners can effectively repair their own shingles, ensuring a durable and protective roof. Taking initiative in roof repairs by knowing how to identify, fix, and prevent problems can result in significant savings over time. Staying informed about maintenance and common pitfalls can significantly extend the life of your roof and safeguard your home effectively. Remember, any repair taken lightly could expose the home to risks that are costly in the long run. Empowerment in knowledge allows homeowners to confidently approach roof repairs, leading to smarter craftsmanship and preserved property security.